I have been experimenting with paper beads and would like to share what I have learnt. I am working my way with writing tutorials so if you find gaps in my explanation, please ask me questions and I will try to answer them.
My intention is to have 2 parts to the bead making tutorial. The first part will focus on bead shapes and how you can get different shapes. The second part will show how to get the patterns and designs on beads. I will additionally discuss about hardening the bead and making it water resistant.
It is possible to make paper beads of varied shapes and the factors impacting the shape are
The dumble shaped beads look like two similar shaped beads joined together.
Here I have taken a used A4 paper and I first drew parallel lines along the longer edge of the paper making long rectangles. On this paper you can see rectangles of width 2 cm, 1 cm and 1/2 cm from left to right. Next I drew diagonal lines across each rectangle dividing the rectangle into triangles. You can see that a few of the rectangles on the right still don't have the diagonal line drawn.
Next I cut out the triangles using scissors. I used scissors for this tutorial but normally I just use my paper cutter and the scale on it to directly cut out the triangles. That saves me the previous step.
Here you can see the triangles of three different widths and same lengths.
I use a home made bead rolling tool for rolling the beads. It is basically a grill stick with a rolled paper in the centre to make a handle. I have slit the stick at one end to make a slot but I tend to use the side with out the slot using it as a needle tool.
I some times also use a tooth pick for making the beads but I find the hole size made with a grill stick more appropriate.
Here you can see the different shapes of beads made with different widths of paper.
Here you can see that the beads are getting fatter from bottom to top tending from a long shaped bead to a more rounder shaped bead.
Here again the beads are getting thicker to bottom to top. I have used one strip for the bottom bead, 2 for the middle one and 4 for the top one.
Here we have a 5th bead in addition to the previous 4 beads in Fig 12. Here you can see the four beads again from a different angle and scale.
The saucer beads in my previous post are made with 1/2 cm wide and 45 cm long paper and this was a thicker paper so I could get saucer beads of same size with just 2 strips that I got with 9 strips in the previous figure.
To make a dumble bead as in Fig 2, use the pattern in this figure. Changing the length, the width and thickness of the paper, you can come up with different shaped beads.
This is a set that I have made with paper beads. I have used pages from an old magazine to make this.
I have used 32 paper beads for this set and used a total of 243 strips of paper that were 2 cm wide at the base of the triangles.
The necklace is made of 21 paper beads of increasing size with the smallest beads made with 3 strips each and the largest one made with 24 strips.
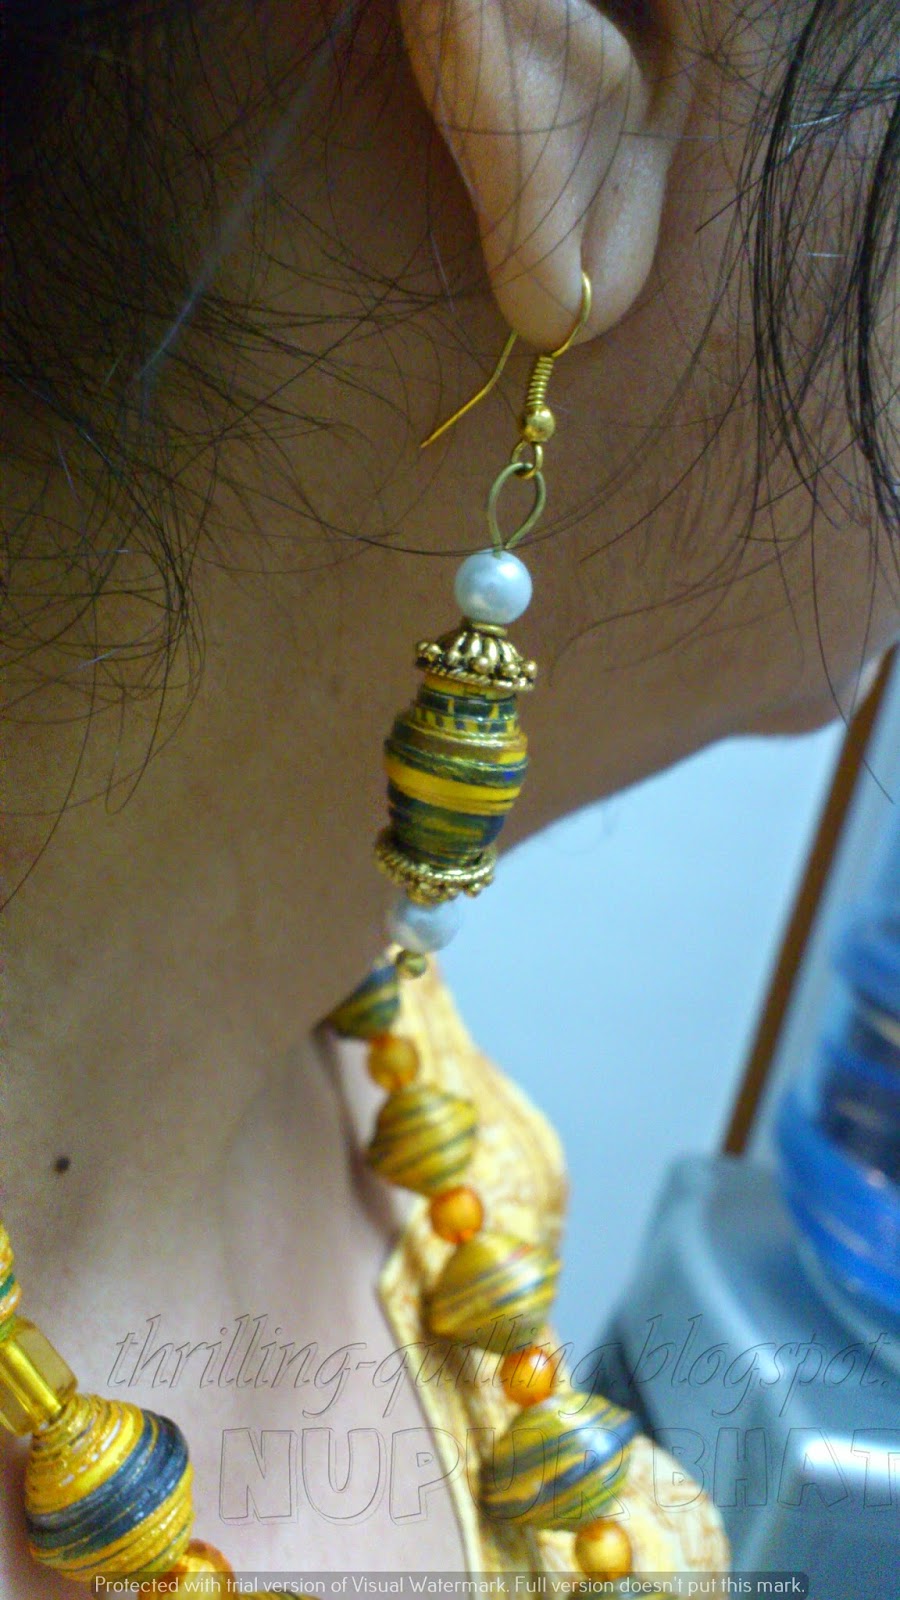
The earrings beads are made with 3 strips each.
After making the beads, I coat the beads with a PVA glue to harden the bead. After this dries up, the bead is again coated with either varnish or transparent nail polish to make give it a gloss and make it water resistant.
My intention is to have 2 parts to the bead making tutorial. The first part will focus on bead shapes and how you can get different shapes. The second part will show how to get the patterns and designs on beads. I will additionally discuss about hardening the bead and making it water resistant.
It is possible to make paper beads of varied shapes and the factors impacting the shape are
- the shape of the paper strip
- the width of the paper
- the length of the paper strip
- the thickness of the paper
The basic principle is that the shorter or thinner the paper, the slimmer the bead from the core (cylindrical) and the longer or thicker the paper, the fatter the bead is from the core (rounder or saucer shaped). The width of the paper strip in addition to the above factors, impacts the shape of the bead.
If I have confused you enough and you are on the verge of leaving the page, just hang on because I am going to explain with pictures what I mean by the above statements.
Here are some basic shaped beads.
 |
| Fig. 1: Basic shapes |
 |
| Fig. 2: Round Beads and Dumble Beads |
Round Beads and Dumble Beads.
The two beads on the top row and right and the small bead on top row left are circular beads. The white blue and purple bead in the top row is cylindrical but looks round as the hole in the bead is very thick.The dumble shaped beads look like two similar shaped beads joined together.
 |
| Fig. 3: Cylinder Beads |
Cylindrical Beads.
These are made with rectangular paper. The tiny blue cylinder on the right is the regular tight coil made with a quilling strip. |
| Fig. 4: Conical Beads |
Conical beads.
The blue white and multi coloured beads here are conical beads. These taper down as a cone. |
| Fig. 5: Long beads and Saucer beads |
Long Beads and Saucer Beads.
The three beads on the right bottom are long beads with the thickness of the bead less than its length. The green and purple bead on the left is a saucer bead. Here the thickness of the bead outwards from the centre is larger than the width of the bead.Now on to the details of how these varied shapes can be made.
 |
| Fig. 6: Paper marked for cutting |
Here I have taken a used A4 paper and I first drew parallel lines along the longer edge of the paper making long rectangles. On this paper you can see rectangles of width 2 cm, 1 cm and 1/2 cm from left to right. Next I drew diagonal lines across each rectangle dividing the rectangle into triangles. You can see that a few of the rectangles on the right still don't have the diagonal line drawn.
 |
| Fig. 7: The cut triangles |
Next I cut out the triangles using scissors. I used scissors for this tutorial but normally I just use my paper cutter and the scale on it to directly cut out the triangles. That saves me the previous step.
Here you can see the triangles of three different widths and same lengths.
 |
| Fig. 8: Bead rolling tool |
I use a home made bead rolling tool for rolling the beads. It is basically a grill stick with a rolled paper in the centre to make a handle. I have slit the stick at one end to make a slot but I tend to use the side with out the slot using it as a needle tool.
I some times also use a tooth pick for making the beads but I find the hole size made with a grill stick more appropriate.
 |
| Fig. 9: Bead shapes comparision |
Here you can see the different shapes of beads made with different widths of paper.
On the left, the beads are made with 2 cm thick strips. The ones in the centre are made with 1 cm thick strips and the ones on the right are made with 1/2 cm thick strips.
Since we used the same paper for all the beads, we have paper strips of same thickness. To make different shaped beads using this paper, I have stacked multiple papers increasing the thickness of the paper and have used that for making the different beads.
 |
| Fig. 10: Beads with 2 cm wide paper |
Here you can see that the beads are getting fatter from bottom to top tending from a long shaped bead to a more rounder shaped bead.
The bead on the bottom is made with a single strip of paper. The one above it with 2 strips piled together and rolled. the next one is with 3 strips together and the top one with 4 strips.
Note that you cannot join the strips end to end as in quilling as the shape of the paper is not rectangular. So you will have to pile them together.
The length of the paper used is about 30 cm. We would have got a bead of similar thickness as the second bead from bottom had we used a paper strip that was 2 cm wide and 60 cm long. The only difference would be that the layers would be more closer and giving a neater effect. But getting hold of a longer paper and cutting the longer paper is more effort. So the choice is yours if you prefer a longer paper of pile more shorter papers.
I think we would get a perfectly round bead with 6 or 7 strips piled together. It is always a good idea to experiment with the paper you are going to use for your project and when you get the perfect shape you want, you make the rest of the beads using the same number of strips.
 |
| Fig. 11: Beads with 1 cm wide paper |
Here again the beads are getting thicker to bottom to top. I have used one strip for the bottom bead, 2 for the middle one and 4 for the top one.
You can see that since the width of the paper is 1 cm, we get a rounder bead with lesser number of strips compared to the strip that was 2 cm wide.
Here we would have got a perfectly round bead with 3 strips. The top one with 4 strips is beginning to get flatter.
Here the beads are made with 1/2 cm wide strips. Again the bottom most bead is made with 1 strip and progressing to 4 strips at the top.
 |
| Fig. 12: Beads with 1/2 cm wide paper |
Here the beads are made with 1/2 cm wide strips. Again the bottom most bead is made with 1 strip and progressing to 4 strips at the top.
Here we see that because the width of the paper is only 1/2 cm, we get a flatter bead with even a single strip. The beads here are tinier than the beads with a wider strip and it is easier to make a saucer bead with a narrower strip.
 |
| Fig. 13: Five beads with 1/2 cm wide paper |
Here we have a 5th bead in addition to the previous 4 beads in Fig 12. Here you can see the four beads again from a different angle and scale.
The left most bead here is made with 9 strips of paper and is a nice saucer.
Just to give a perspective the green and purple bead in fig 5 is made with 40 strips of 1/2 cm width.
 |
| Fig. 14: Some saucer beads |
The saucer beads in my previous post are made with 1/2 cm wide and 45 cm long paper and this was a thicker paper so I could get saucer beads of same size with just 2 strips that I got with 9 strips in the previous figure.
 |
| Fig 15: Dumble Bead strip |
To make a dumble bead as in Fig 2, use the pattern in this figure. Changing the length, the width and thickness of the paper, you can come up with different shaped beads.
 |
| Fig 16: Paper Beads set |
 |
| Fig 17: Paper bead set |
I have used 32 paper beads for this set and used a total of 243 strips of paper that were 2 cm wide at the base of the triangles.
 |
| Fig 18: Paper bead necklace |
 |
| Fig 19: Paper bead earrings |
 |
| Fig 20: Paper bead Bracelet |
The bracelet is made with 9 beads of 3 strips each.
 |
| Fig 21: Bracelet |
The snug sitting bracelet.
After making the beads, I coat the beads with a PVA glue to harden the bead. After this dries up, the bead is again coated with either varnish or transparent nail polish to make give it a gloss and make it water resistant.
Hope the tutorial was helpful. I would love to hear how you found the tutorial, things you found lacking and questions if I have missed something.
The next tutorial will talk about giving colour to the beads and how different pattern paper give a different effect to the beads.
If you find my work inspiring and create something similar, please quote my work and blog in your post. I would also appreciate if you leave a comment. All budding artists do need a pat on the back! Thanks for visiting!