Monday, December 8, 2014

Here and Now: Quilling jewellery


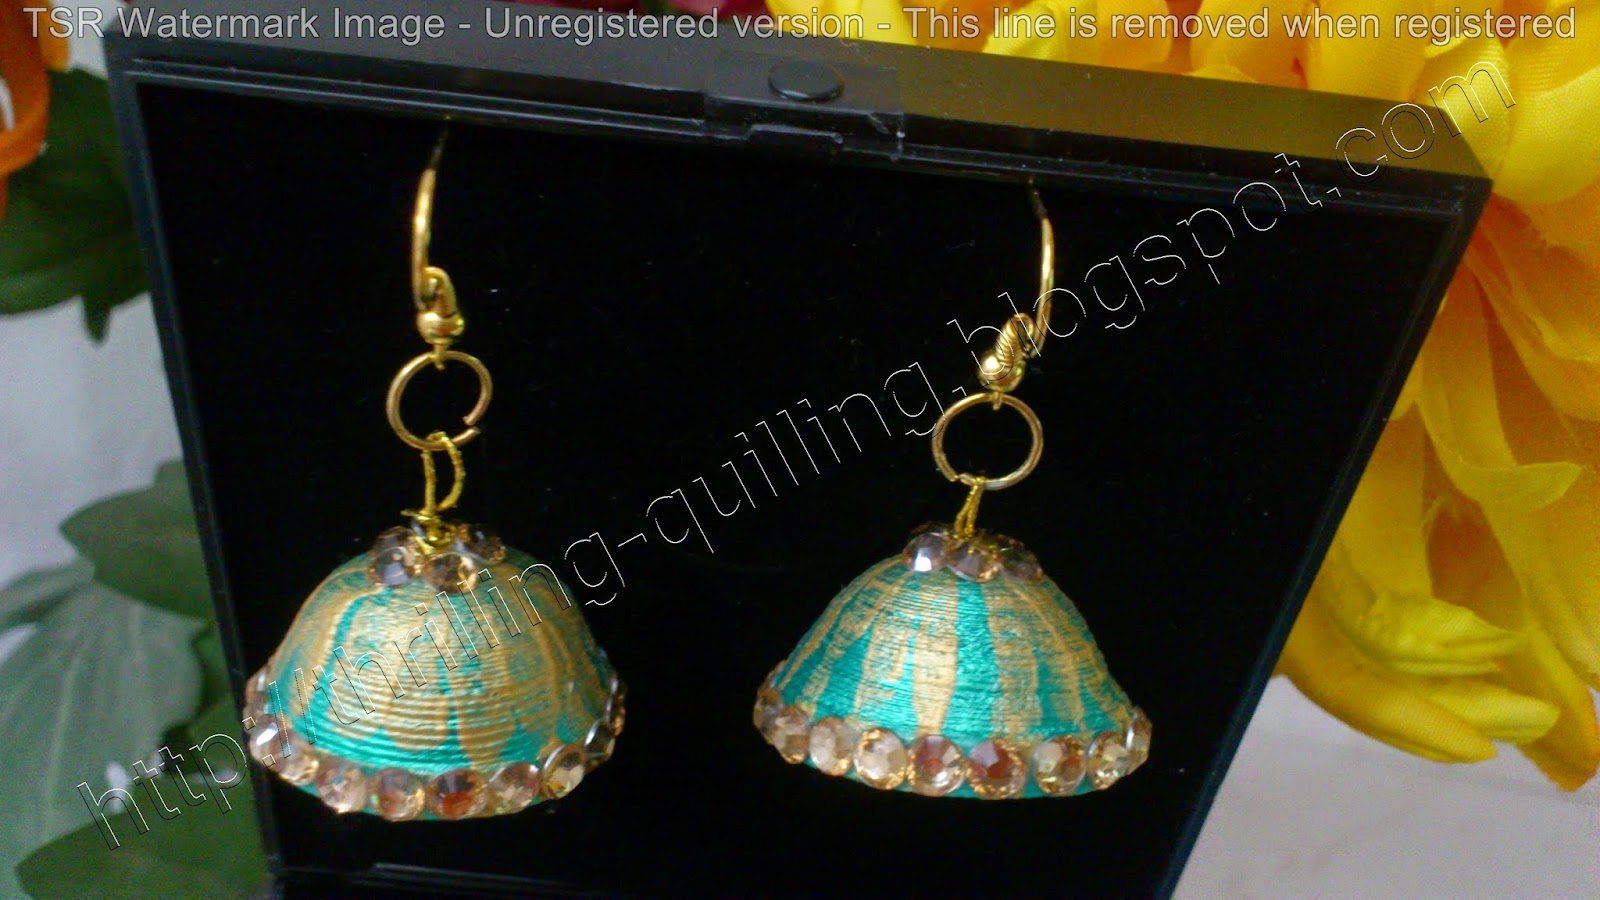
Lately I have been doing a lot of quilling jewellery and have been trying to get hold of jewellery wire, ear hooks beads and and all sorts of embellishments to create these lovely pieces. And of course I have been reading, watching videos and experimenting to learn more about making jewellery. So here are some of the pieces that I have created. I love wearing these colourful creations to match my clothes and the best thing is I can create my own colour combinations as per my need and wardrobe.

Here is a picture of a few of my quilled earrings.


And close ups...


If you find my work inspiring and create something similar, please quote my work and blog in your post. I would also appreciate if you leave a comment. All budding artists do need a pat on the back! Thanks for visiting!


Friday, December 5, 2014

Here and Now: My tools collection

When I first started quilling my only resources we hand cut paper strips and toothpick or a pin and of course lots of passion. Over the past few years, I have been collecting tools where ever I could find them. I have a weakness for tools and always want a good and varied supply in my collection: either store bought ones or self created DIY ones. So I have tools in my drawers from all over the world. Some are from Sweden, France and Canada and most from Dubai. In the past month, I have been doing a lot of jewellery making with quilling and so the pliers are my latest addition from India.

These are photos of part of my tools and supplies collection.


Wednesday, November 19, 2014

Catching up series: Christmas cards

The month of October and November when it starts getting cold and dark in Sweden, Christmas is really something that everyone starts looking forward to. These are a few of the cards that I made last year in Stockholm. I will post more of these in a later post. I was experimenting with stamping and heat embossing so you can see those techniques in the cards. I also tried layering the cards and I think it gives a very professional and finished look to the cards.


If you find my work inspiring and create something similar, please quote my work and blog in your post. I would also appreciate if you leave a comment. All budding artists do need a pat on the back! Thanks for visiting!

Saturday, November 15, 2014

Catching-Up Series: Quilled Vase

I wanted to try my hand further at some 3D quilling after the jewellery box and so decided to make a Vase. My initial idea was to use a plastic yoghurt drink bottle as a quideline and created the quilled piece on its own. But that seems quite difficult so I ended up sticking up the quilled pieces on the bottle itself. Turns out to be not a bad idea as I can add water to the bottle and use it as a real vase!


If you find my work inspiring and create something similar, please quote my work and blog in your post. I would also appreciate if you leave a comment or follow my blog. All budding artists do need a pat on the back! Thanks for visiting!

Coming Back

My last post was more than one and a half years ago. I have not stopped creating during this time... its just that so much was happening and then a big mental block set in. But now I am finally breaking this block and coming back.

During this time, we moved from Dubai to India. From here, my son left for University to UK and I was in Sweden for 3 months with my work. Came back to India but soon got caught with my father's health and surgery. And then life just kept on moving with my poor blog neglected but always at the back of my mind.

During this time I have continued with quilling and also tried my hand at stamping and heat embossing. I made a lot of cards using a mix of these both techniques along with punching. I tried a couple of dolls with 3D quilling. I also experimented with paper beads, pottery painting and am now learning the technique of jewellery making. My tools are still in post and I am eagerly awaiting their arrival. In the meantime I have made some quilled jewellery pieces. There is so much to learn and discover and time seems short.

But from now on I intend to share more and bring my blog back to life again. I plan to post once everyday as my high end goal but on the low end at least 2 posts in a week. My intention is to post what I am currently creating as well as catch-up with my creations of the past one and a half year.

My current posts will start with the title 'Here and Now:' and my old creation posts will start with 'Catching-Up:'.

So my dear readers, Thrilling Quilling is back now and looking forward to interacting with you again!

Sunday, April 21, 2013

Jewellery Box


I was thinking of making a utility item using quilling and thought of trying out with a little jewellery box. Initially I had thought of using a box as a mold and quill over it but then decided to use more solid shapes of quilling paper to create the box.

I used around 110 strips of 30 cm length to make this box. I started with making a circular rim with 21 tight coils. To make the walls, I again used light coils but as this paper was thinner than the base rim, I pushed the circles into tight ovals and glued over the base rim. I created the wall with 7 layers of circles. To make the base of the box, I used a combination of tight and loose coil shapes. The centre piece is a tight coil painted in bronze colour.

For the lid, I again started with a circular rim of tight coils. I lined the inside of this circular rim with two 6 mm strips that were flush on the outside but protruding on the inside. The reason for this is to make the lid fit snugly on the box without sliding off. For the handle knob, I joined a 4 cm long and 6 mm wide strip with a 30 cm long, 3 mm wide strip and made a tight coil. On the protruding centre, I glued on a paper bead /ball and painted the base and the bead into bronze colour.

And here are some pictures of how the box turned out. You can see that the paper appears wet as I covered it with varnish last night and that is still drying up.

The finished box.


A peak at the inside.


Top view of the inside.


The lid from the inside showing the protruding rim.


I am linking this post to


If you find my work inspiring and create something similar, please quote my work and blog in your post. I would also appreciate if you leave a comment or follow my blog. All budding artists do need a pat on the back! Thanks for visiting!


Monday, April 8, 2013

Challenge inspired card

When I started quilling, I used to take time to add borders to the card or layer the paper before adding my quilling to it. But lately, I have been just quilling on the card. So when I saw a challenge with a sketch at Come and get it Challenges, I just had to give it a try.

After looking through different colour combinations, this is what I came up with. Hope you like it!


I am linking this post to

If you find my work inspiring and create something similar, please quote my work and blog in your post. I would also appreciate if you leave a comment and follow my blog. All budding artists do need a pat on the back! Thanks for visiting! 

Sunday, April 7, 2013

The beautiful tangles.

Looking for new designs to quill, I dug into my embroidery book from a life time ago and decided to make the pattern on a card.

It looks so amazing in real life. The effects it produces looking from different angles is beautiful.

Here's how the picture looks from far.


And closer up.

And from an angle.


I am linking this post to 


If you find my work inspiring and create something similar, please quote my work and blog in your post. I would also appreciate if you leave a comment. All budding artists do need a pat on the back! Thanks for visiting!

Saturday, April 6, 2013

Blog Award - Yippee!!!

I am thrilled to receive my first ever blog award! Thank you so much Zoe for appreciating my work and passing me this honour.


Rules:

- thank  the person who gave you the award

- put a link of her/his blog in your blog

- put in your blog the logo of the award

- give the award to 7 blogs with less than 50 members

- put links to this blog

- inform these people that they received the award

- write 7 thing (facts) about yourself 


I have to pass this award to 7 bloggers with less than 50 members. Usually everyone is looking at popular blogs with a lot of followers so this is wonderful as it provides encouragement to new bloggers. Visit their blogs since they also have good crafts to share.:

  1. Nimmo
  2. Kavitha
  3. Swathi
  4. Maneka
  5. Sheetal
  6. Galina
  7. La Dolce Vita


Now 7 facts about myself:

  1. I love creativity in any form.
  2. I have tremendous patience.
  3. I am capable of thinking out of the box.
  4. I have always given handmade cards to friends and family.
  5. I have learnt quilling from fellow bloggers over internet.
  6. I love nature.
  7. I hate exercising.


Thursday, April 4, 2013

18th Birthday card

My son turned 18 this February. Now that is a landmark birthday! So I had to make something special for him. After raking my brain endlessly, I came up with this idea...

18 signifies legal adulthood. You are bestowed with a lot of rights: the right to drive, the right to vote, the right to signing all contracts without needing a guardian authorization, the right to a lot of good things as well as the right to legally pursue a lot of vices as drinking, smoking and gambling. So crossing the age of 18 opens up a special door, a door where he is legally allowed to make his own decisions. So basically at 18 you are provided with a key to a lot of rights.

My idea for the card was decided then. I wanted to make a key for him with the number 18 on it and a door that leads to freedom. I wanted to give him the message as Spiderman has said, "WITH GREAT POWERS COME GREAT RESPONSIBILITY" As my son's dream is to pursue law after completing his school this year, I wanted to write the message for him in a legal sounding language containing the gist of Spiderman's message.

When I told my quilling student whose son is 16 (now she is a dear friend) of my idea, she said she is getting goosebumps listening to the idea.

So much for the idea! Now on to the execution! This is the card that I have come up with.

I have used golden and black strips for the complete work. The shaft of the key is made by rolling a wider strip and then rolling it in golden paper. The letters FREEDOM are quilled with golden paper. All the text is written in free hand. The chain is quilled with 1.5 mm golden paper. I didn't want to glue the key down to the card, so I created a casing for the key where it can rest. My son can take the key in hand when opening the door that leads to adulthood. Of-course the key is connected to a key chain that is glued to the card so he won't loose the key!

Dear reader, you can be the judge if the idea was executed in a good way or not.


I am linking this post to 


If you find my work inspiring and create something similar, please quote my work and blog in your post. I would also appreciate if you leave a comment. All budding artists do need a pat on the back! Thanks for visiting!


Related Posts Plugin for WordPress, Blogger...